


Upgrade your camera with a WiFi memory card
 My smartphone has a fantastic camera and it’s a like a digital notebook for documenting events and sharing content, especially photos. But when I want to produce a better quality image, say a portrait of an interview partner, or when I want to work in low light conditions, then I’ll reach for my digital stills camera.
The question is: how do I make my SLR camera as “mobile” as my smartphone so I can transfer images quickly from the camera to another device and share them on the web?
Yes, I can use a USB cable to connect my camera to either my laptop or my iPad or take out the SD card and plug it directly into the computer. But another way is to use a WiFi enabled SD memory card and there are some interesting advantages of using these cards for covering events.
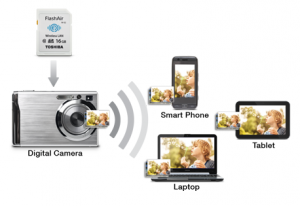
WiFi enabled SD cards have been around for a while now. The WiFi chip inside the card creates its own wireless network, which allows you to connect your camera via the SD card to another device.
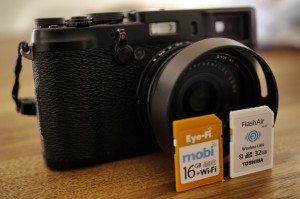
In this post I’m going to refer to two Class 10 WiFi SD cards: the Eye-Fi mobi and the Toshiba FlashAir.
Shoot and upload on the run
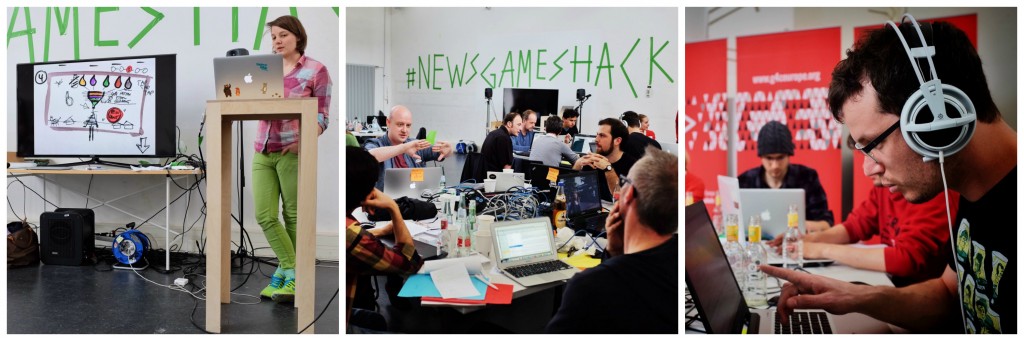
At the recent Newsgames hackathon in Cologne I tested a 16GB Eye-Fi WiFi enabled SD card.
The hackathon took place inside a large seminar room. To document the event, I wanted to be able to walk around and shoot photos of the hacker teams, upload the images to my iPad for a quick edit and then send them to a blog and social media.
The Eye-Fi card allowed me to automatically push images to my iPad as I was shooting. To make the wireless transfer faster, I deliberately shot in .jpeg format to keep each image file size small – around 4-5 MB per image.
I was able to walk around up to 20 metres or so from my iPad and keep shooting, knowing that every image was being transferred to my iPad ready for editing.
This was exactly what I needed to cover this event in near “real time”. I was able to shoot lots of good quality images, far better than using my iPhone, and edit the images in batches in the Snapseed iPad application and then quickly upload to the blog, Twitter and Instagram.
It’s important to note that although the Eye-Fi card can record photos and video in various types of formats (.jpeg, RAW, .mpg, .mov, .flv, .wmv, .avi, .mp4, .mts, .m4v, .3gp) it can only transfer .jpeg files.
Fortunately my Fujifilm X100S produces excellent .jpeg images, and despite the smaller file size, my photos were published in The Guardian, Deutsche Welle, Page magazine and in several journalism publications.
But this workflow is not going to suit every situation.
One problem with the Eye-Fi mobi card is that it uploads every photo you take whether you like it or not. In other words, it uploads the entire album. This might be fine if you have the WiFi transfer mode on as you’re shooting, but if you capture a lot of photos and then engage the WiFi transfer mode, you might find yourself waiting for the best image to be transferred.
One work around is to shoot in RAW and then convert selected images to .jpeg format in the camera’s playback mode. The card will then transfer only the .jpeg files. Bear in mind that not all cameras offer in-camera .jpeg conversion. Another way is to “protect” the files you want to transfer. This might be a bit fiddly to do depending on your camera.
The set up of the Eye-Fi mobi card though was very straightforward. You simply download a free iOS or Android app that works as the dashboard for transferring images and enter the card’s activation key. The card creates its own b/g/n WiFi hotspot allowing your smartphone, tablet or computer to make a connection. My camera also supports the Eye-Fi SD card and offers an upload option directly from the camera’s menu.
Only transfer the pics you want
I’ve also been using the Toshiba FlashAir (version 2) 32GB Wireless SD card and it works in a similar way to the Eye-Fi. The card creates its own WiFi network and you install an app on your smartphone or tablet to capture the images.
I think the big advantage the FlashAir has over the Eye-Fi mobi is the possibility of using selective transfer for the images. From the iOS or Android app on your device, you can see all of the images you’ve taken and then you can select the ones to transfer.
This could be really handy if you’re working in a team to cover an event. Photographers can get on with the job of shooting while editors can see the thumbnail images they are capturing on their tablet or computer and then select an image for editing and uploading to the web and social media.
 The FlashAir also allows up to seven devices to connect to the card simultaneously. Again this could be useful for small teams covering conferences or panel discussions via “live blogs” and social media.
Great solution but not perfect yet
Both cards have their selling points but also a few drawbacks.
Connecting my iPad or iPhone to both the Eye-Fi and FlashAir card was not always instantaneous – even when both devices were side by side. Sometimes it would take a couple of attempts to connect. But once connected, the transfer of images was usually stable. Make sure you disable your camera’s auto-off function otherwise transfer will be interrupted when the camera goes to sleep.
Both cards can be draining on batteries.
On the Eye-Fi I encountered “Read Errors” messages several times. Ejecting and installing the card usually solved this problem and I have never lost images. However it doesn’t inspire confidence, especially if you want to use this in a professional capacity everday.
The Toshiba FlashAir also has a quirk. If you reformat the card in your camera, you will wipe the firmware that controls the WiFi chip. This means downloading and reinstalling the firmware from Toshiba’s website. It’s not a reason not the use the card, but it’s an easy mistake to make as in-camera card formatting is a common practice.
I also found the app for the FlashAir app a little bit clunky to use. It seems as if user interface was an afterthought in design. As an alternative, Photosync is a good mobile photo file transfer app that works with the FlashAir.
Hopefully competitors in this market will look each other’s products and produce a card that offers both quick and instantaneous connections, and a choice between batch transfer and selective image transfers.
Keep in mind the cost of these cards is usually two to three times that of normal SD cards, so expectations on functionality and reliability are understandably high.
Gradually, WiFi connectivity is becoming a standard feature in cameras. My new Lumix GH4 sports WiFi. And with Photokina in Cologne almost upon us, WiFi is bound to be a function that will become more widely available in new models.
For now though a WiFi SD card does a brilliant job of adding wireless functionality to “upgrade” almost any digital stills camera.
And while these WiFi SD cards are not yet perfect, they are well worth testing to see how they might give you more options for covering events and making your stills camera “mobile”.
Written by Guy Degen, edited by Kate Hairsine


![]()